Synchronisation des Ressources
Introduction
La synchronisation permet d'alimenter automatiquement l'annuaire de Process Studio à partir de sources externes. Cela évite la double saisie et assure que les informations (email, service, manager) sont toujours à jour.
Sources supportées :
- Annuaire LDAP / Active Directory (Le plus fréquent)
- Fichiers CSV (Pour les partenaires ou données HR spécifiques)
Synchronisation LDAP / Active Directory
L'import LDAP connecte Process Studio à votre Active Directory d'entreprise.
1. Configurer le Filtre LDAP
Cette étape définit QUI on importe (Utilisateurs, Groupes, Rôles).
- Allez dans le module Organisation.
- Cliquez sur Synchronisation (ou Configuration de l'import/export).
- Sélectionnez LDAP et créez une nouvelle configuration.
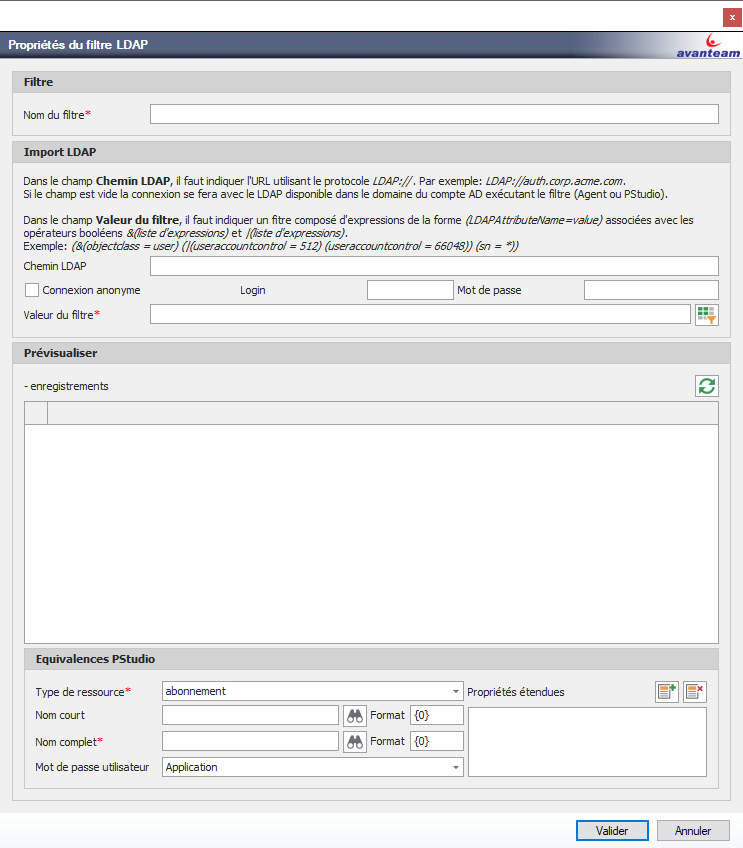
Paramètres clés :
- Serveur : Adresse du contrôleur de domaine (ex:
ldap.entreprise.local). - Authentification : Compte de service (lecture seule) pour interroger l'AD.
- Filtre : Requête LDAP pour cibler les utilisateurs actifs.
Exemple de filtre :
(&(objectCategory=person)(objectClass=user)(!(userAccountControl:1.2.840.113556.1.4.803:=2)))
Ce filtre exclut les comptes désactivés.
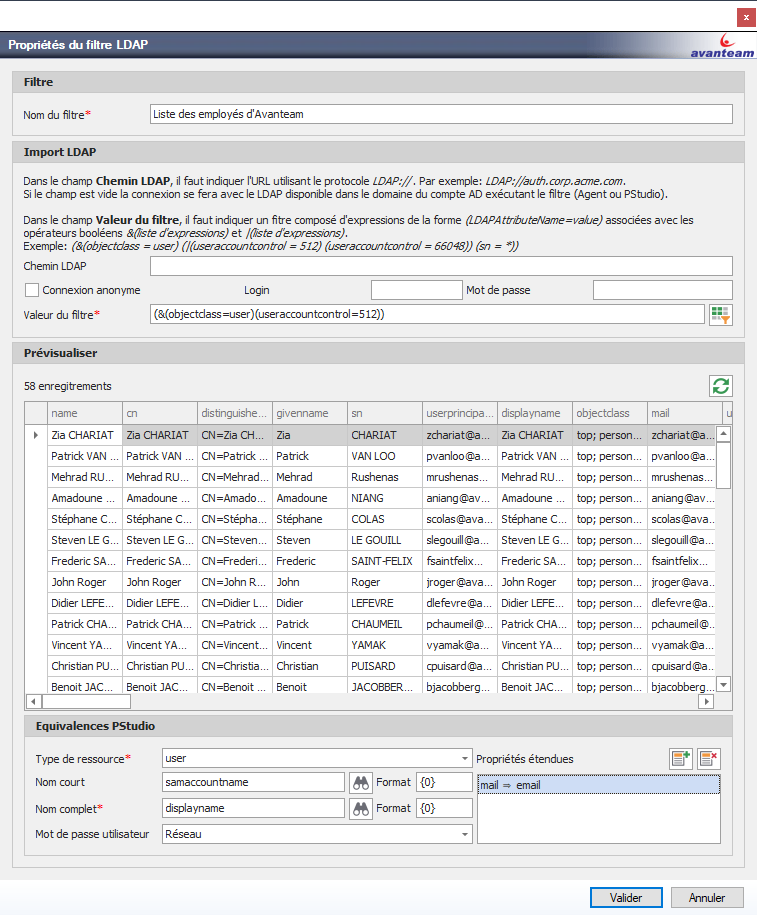
2. Mapper les attributs
Il faut associer les champs de l'AD aux champs de Process Studio.
![]()
| Attribut Active Directory | Champ Process Studio |
|---|---|
sAMAccountName | Login (Identifiant) |
displayName | Nom complet |
mail | |
department | Service |
title | Fonction |
manager | Manager (pour la hiérarchie) |
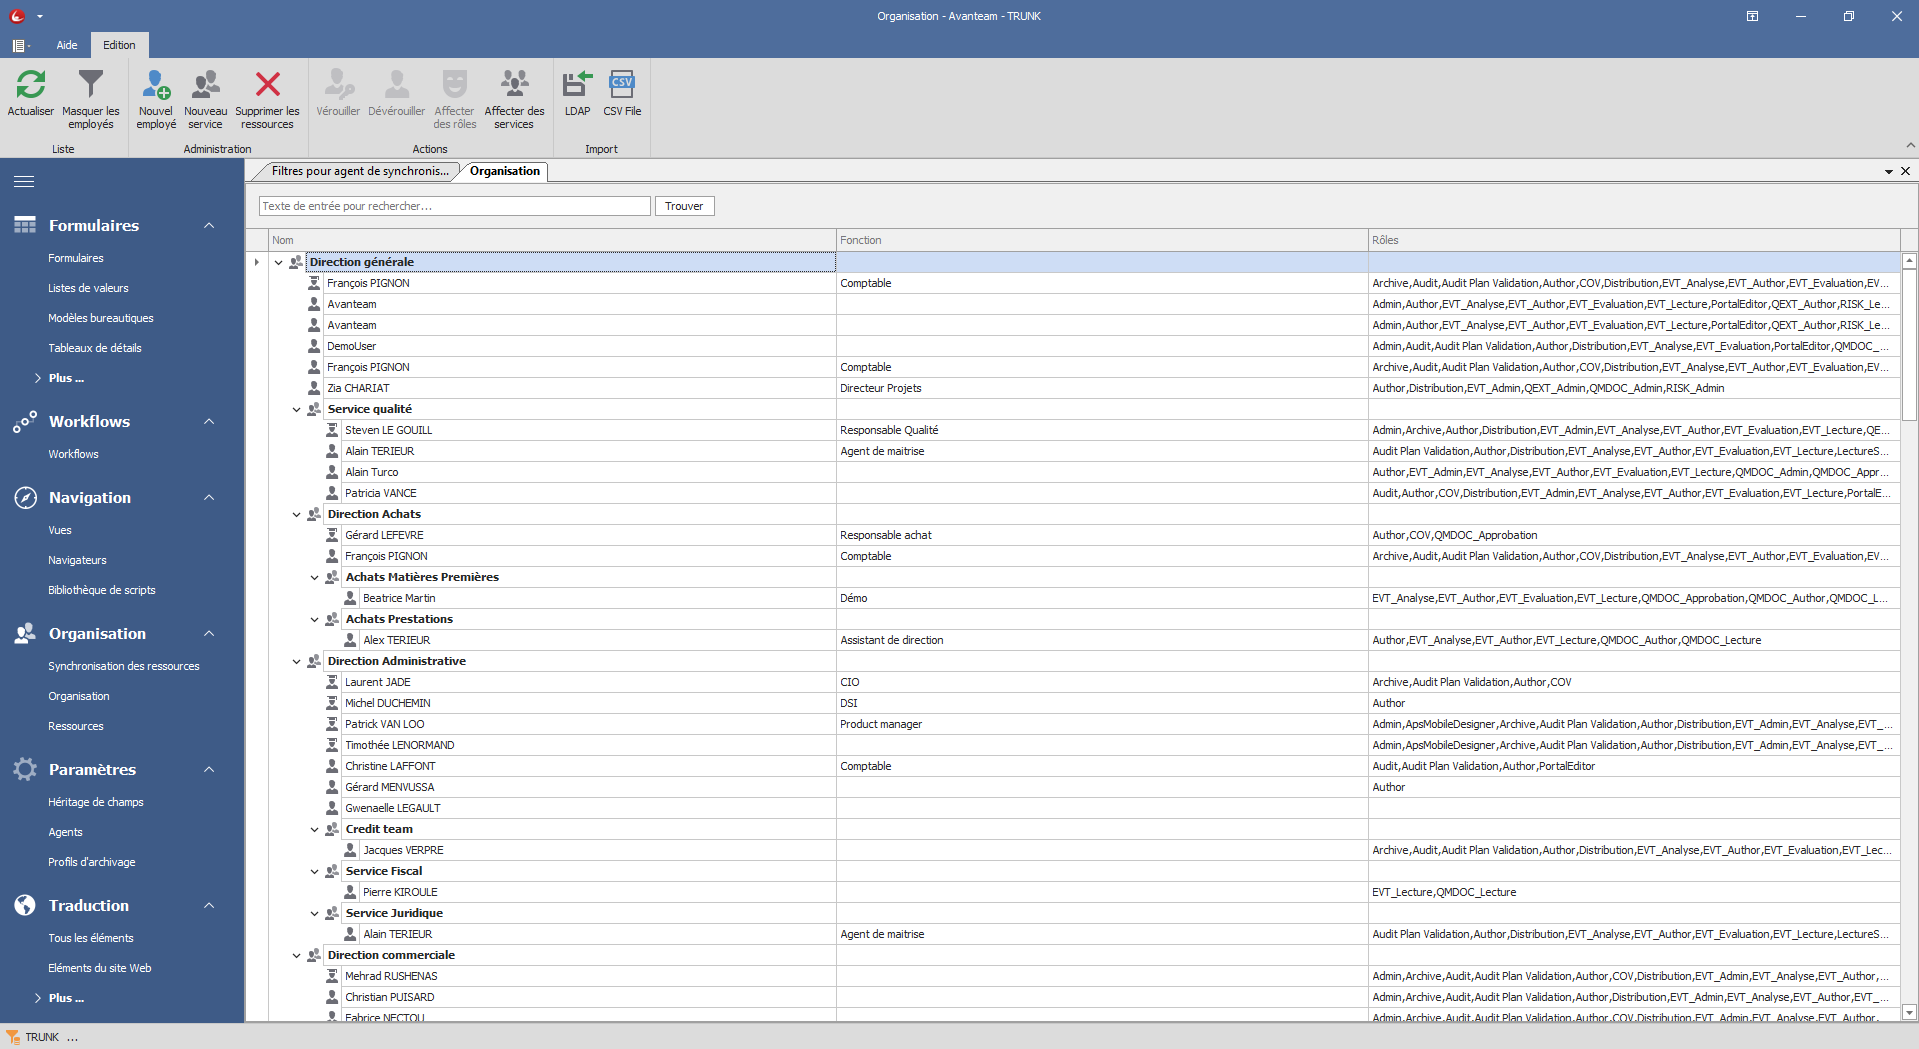
3. Exécuter l'import LDAP
Une fois le filtre prêt, retournez dans la vue principale Organisation :
- Cliquez sur la flèche sous le bouton LDAP dans le ruban.
- Sélectionnez le profil de synchronisation que vous venez de créer.
- (Optionnel) Cochez "Ouvrir les fiches après import" pour vérifier les données importées.
- Cliquez sur Démarrer l'import.
Synchronisation CSV
Si vous ne possédez pas d'annuaire centralisé, l'import CSV est l'alternative.
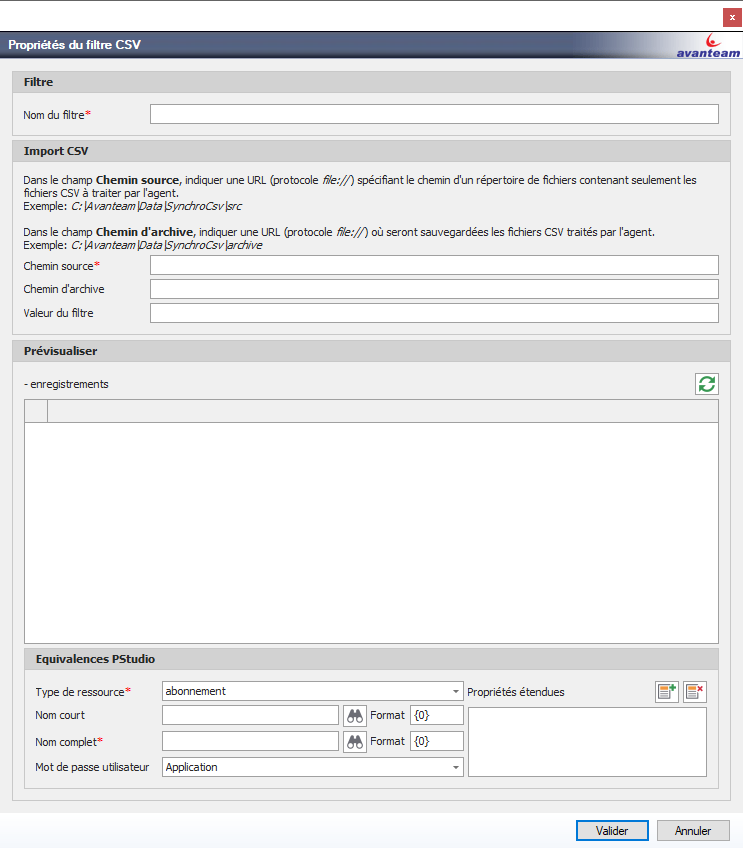
1. Configurer le Filtre CSV
- Dans la vue Synchronisation, cliquez sur CSV.
- Renseignez :
- Chemin source : Emplacement du fichier à importer.
- Chemin archive : Où déplacer le fichier après traitement.
2. Format du fichier
Le fichier doit être structuré avec un séparateur clair (Point-virgule recommandé). Exemple :
Login;Nom;Prenom;Email;Service
jdupont;DUPONT;Jean;j.dupont@email.com;Commercial
Automatisation (Agents)
Pour que les données restent à jour sans intervention manuelle (ex: arrivée d'un nouveau collaborateur), il faut planifier ces imports.
- Accédez au Panneau de configuration > Tâches planifiées (Agents).
- Créez une tâche qui exécute le profil de synchronisation (LDAP ou CSV) créé plus haut.
- Définissez la fréquence (ex: Toutes les nuits à 02h00).